
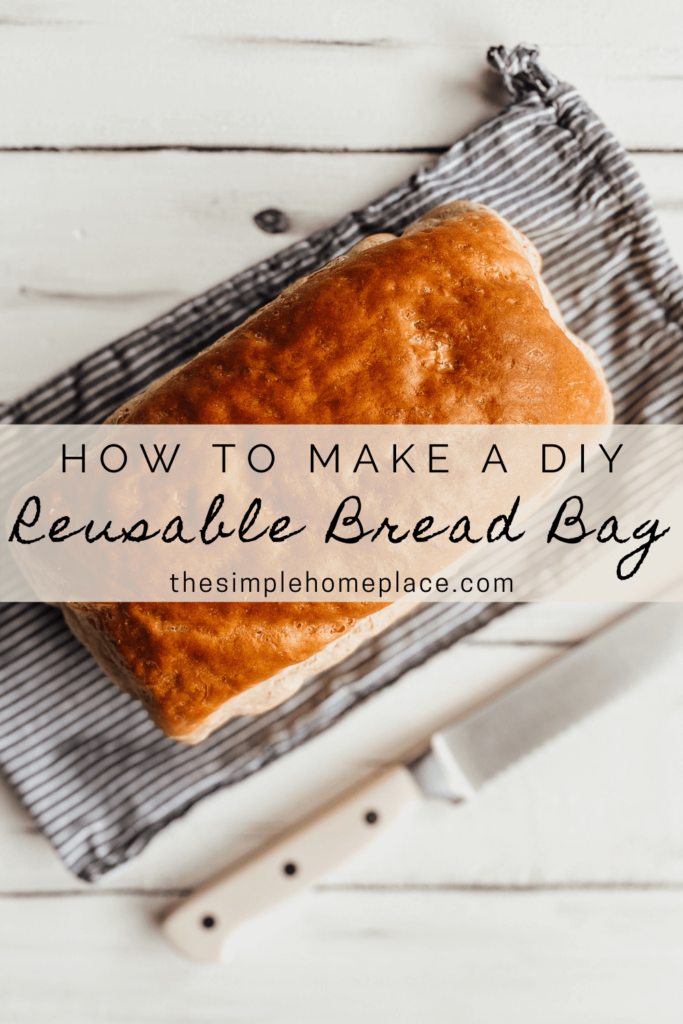
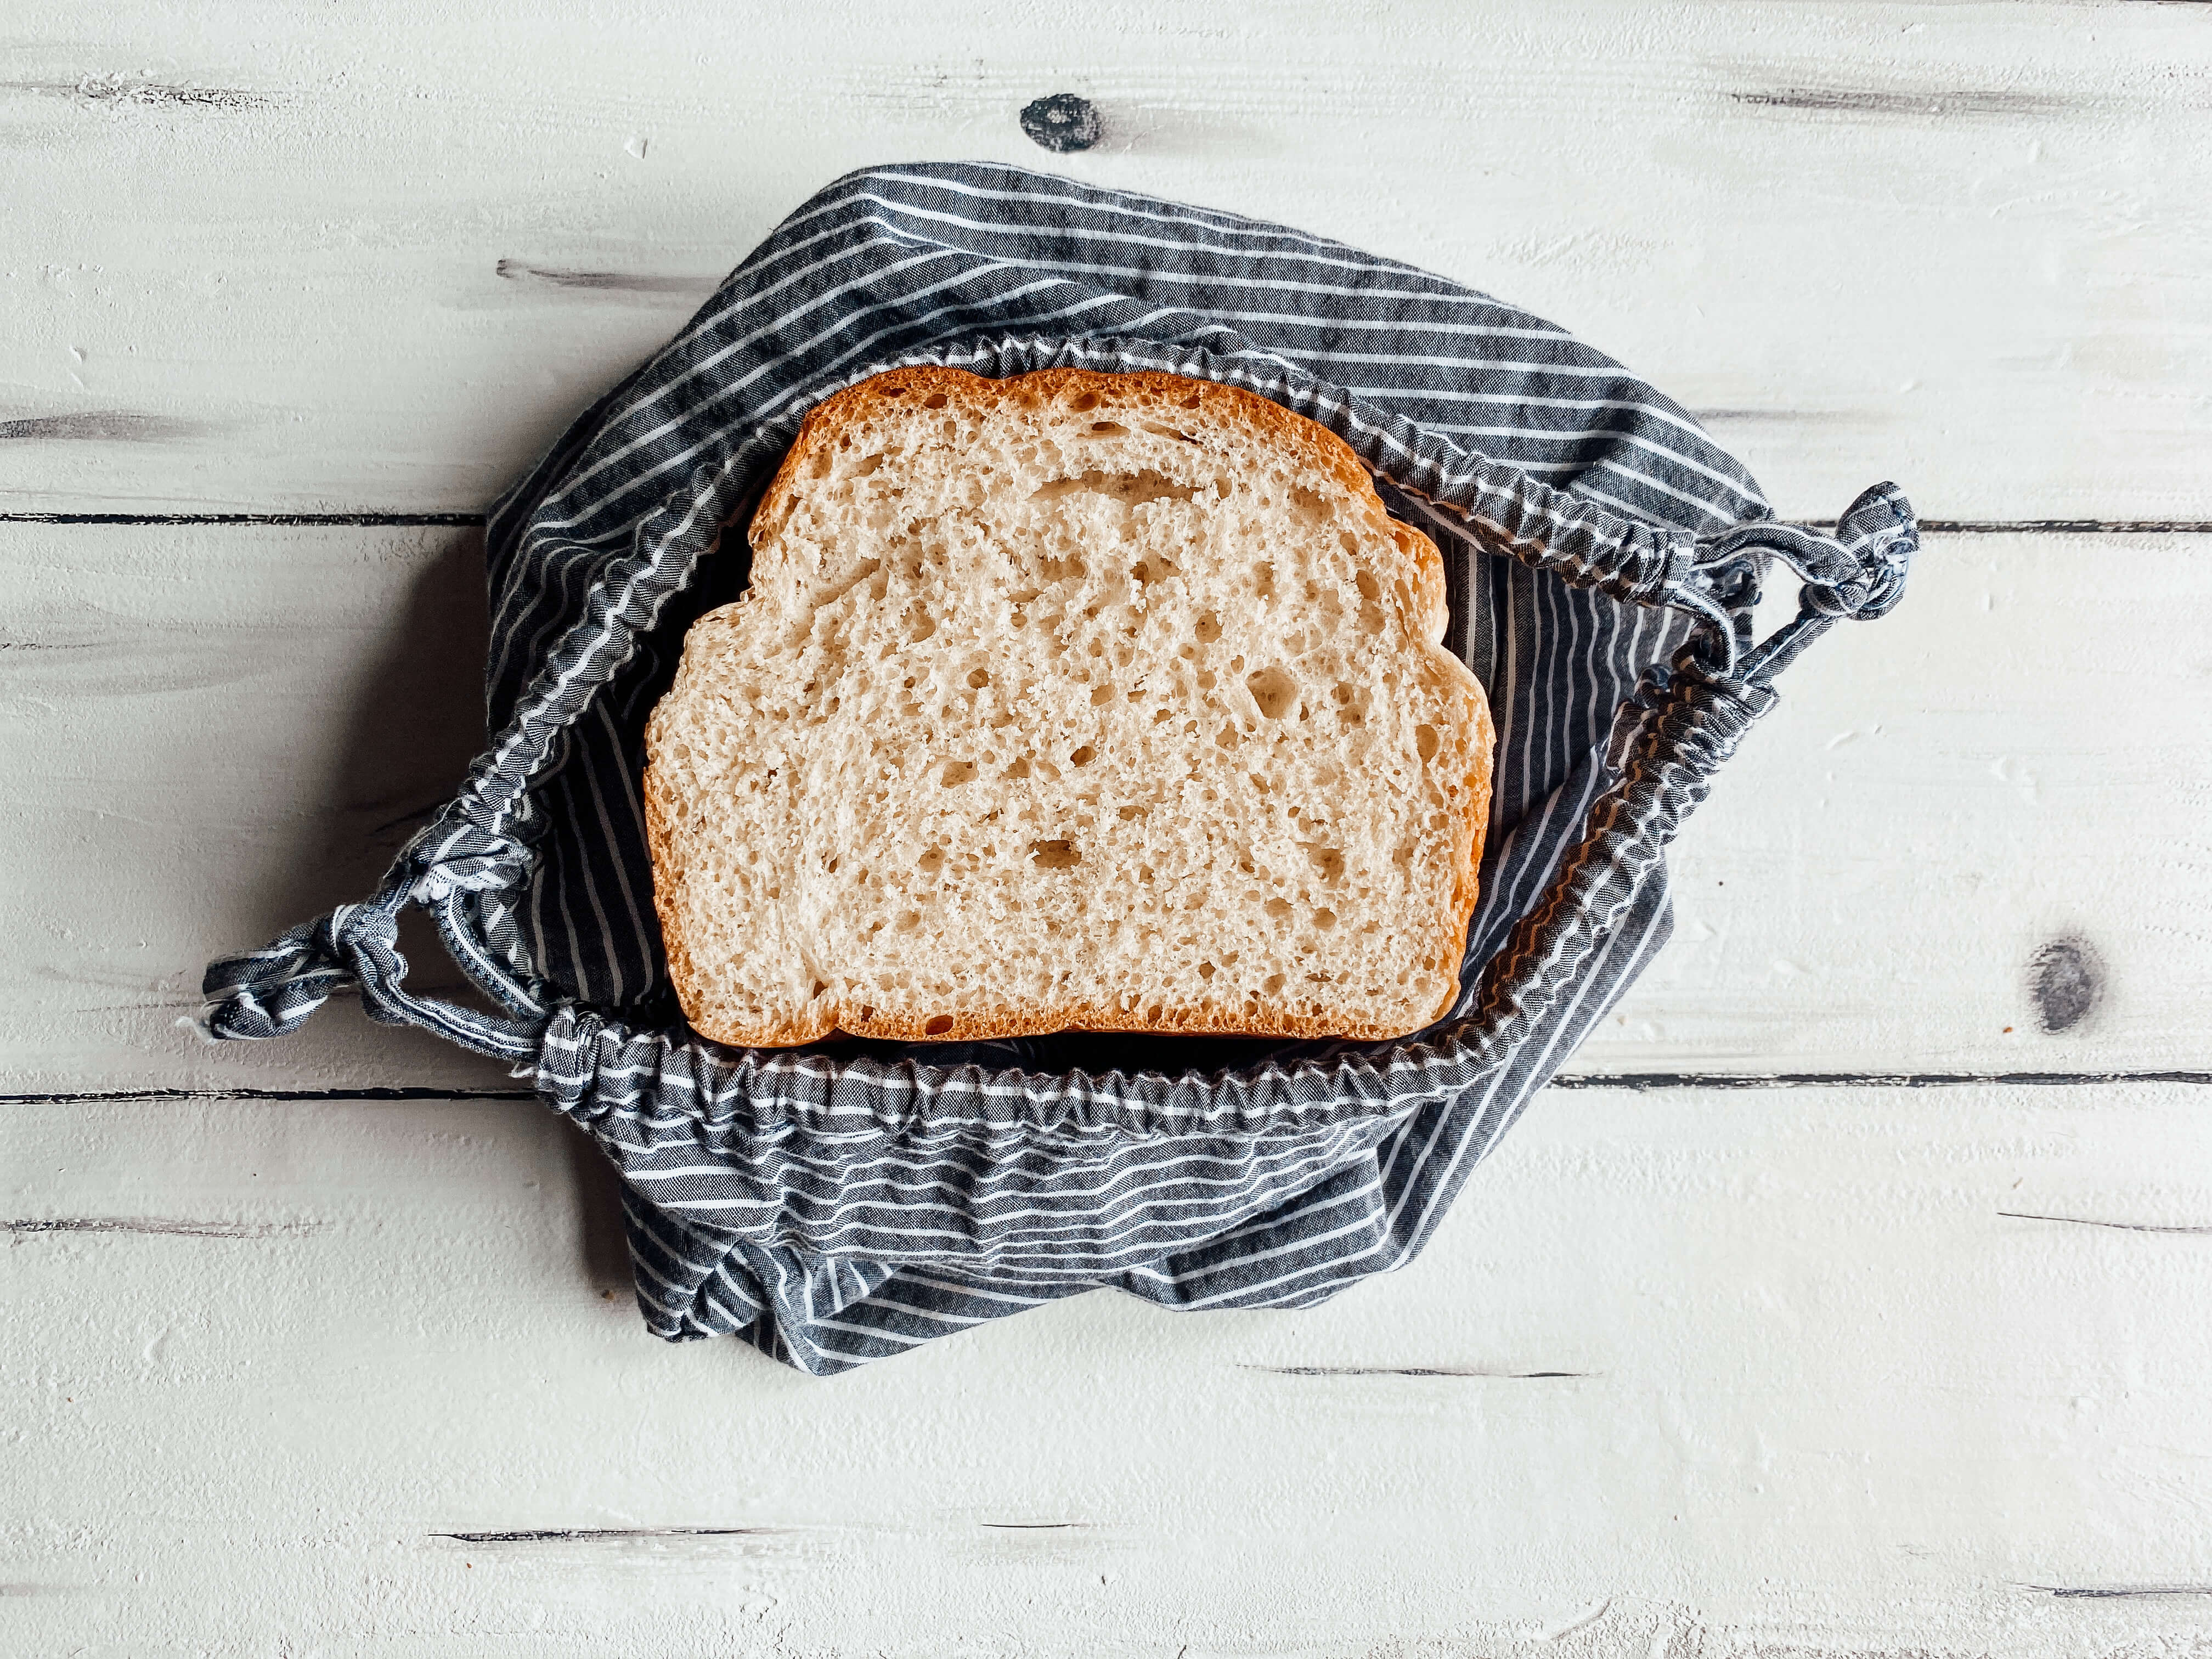
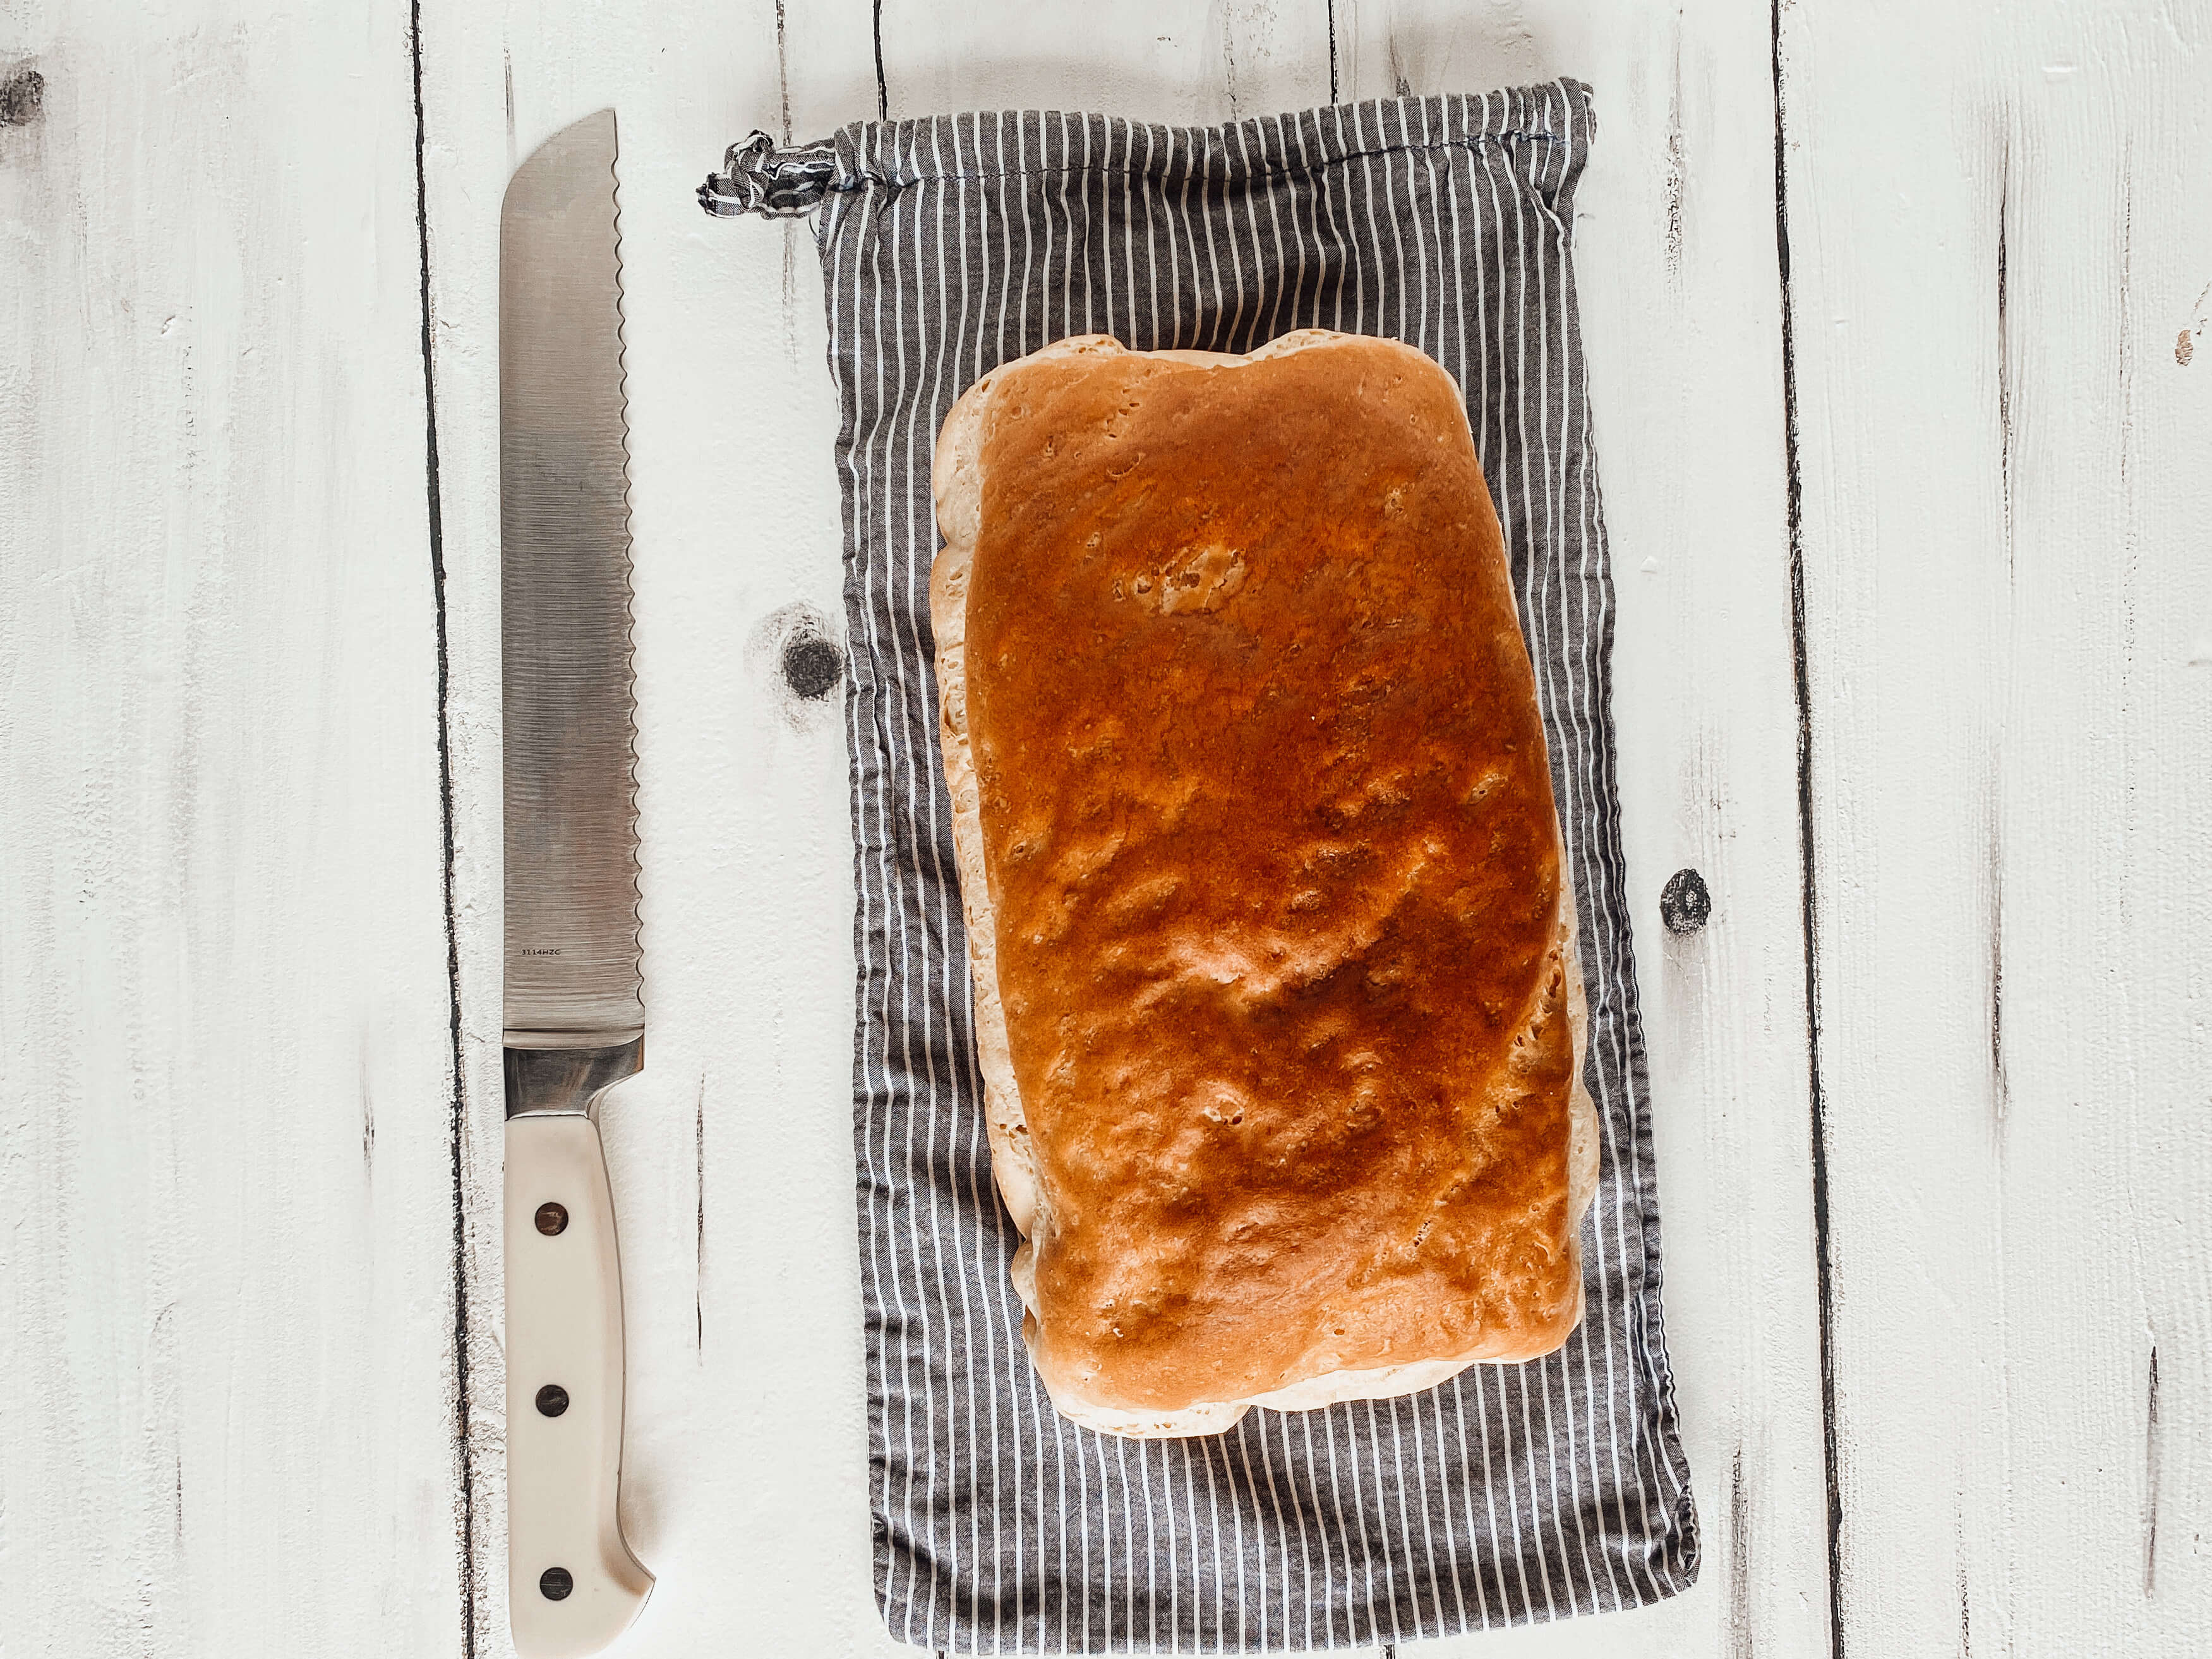
A reusable DIY bread bag is easy to make and great for storing your fresh homemade bread. The breathable material allows for airflow, keeping your bread fresher longer. These bags are a great no-waste option and make wonderful gifts for the bakers in your life!
I’ve been making homemade bread for quite a while now and in the beginning, I always had a hard time finding a good solution for storing it. My solution back then was to put my bread in a plastic zip top bag and store it in the refrigerator. Homemade bread tends to get moldy quickly, so storing it in the refrigerator helps keep it longer. The problem with storing bread in the refrigerator is it becomes hard and dry quicker. The only good way to eat the bread is toasted because the refrigerator sucks all the moisture out.
So, in an effort to reduce my plastic use and keep my homemade bread fresher, longer, I thought I’d try my hand at making a reusable DIY bread bag! The beauty of reusable bread bags is that the material used (typically cotton or linen) allows for airflow in the bag. This prevents moisture from building up and creating mold. It also keeps the crust, crusty, and the inside nice and soft.
Homemade bread doesn’t keep as long as conventional store bought bread because it lacks preservatives, but reusable bread bags help extend the life! When using a bread bag, you can usually store the bread in a cool, dark place for 3-5 days. If your house is anything like mine, fresh bread doesn’t last that long, so that is plenty of time! These bags are also great for storing things like homemade bagels, scones, soft pretzels and more.
In this tutorial, I’ll go over how to easily create your own bread bag and will give you instructions for a bag that fits two loaves and a bag that fits one loaf! I’ve also included a video tutorial if you’re more of a visual person!
PIN IT FOR LATER!
VIDEO TUTORIAL
This post may contain affiliate links, which means I may receive a commission, at no extra cost to you, if you make a purchase through a link. Please see our full disclosure here for further information.
SUPPLIES
- 1/2 yard 100% cotton or linen fabric
- 100% cotton or all purpose coordinating thread
- Craft Scissors
- Pins
- Tape measure
- Iron and ironing board
- Sewing machine
HOW TO MAKE A REUSABLE DIY BREAD BAG
Size 1: Two Loaves (Video Tutorial)
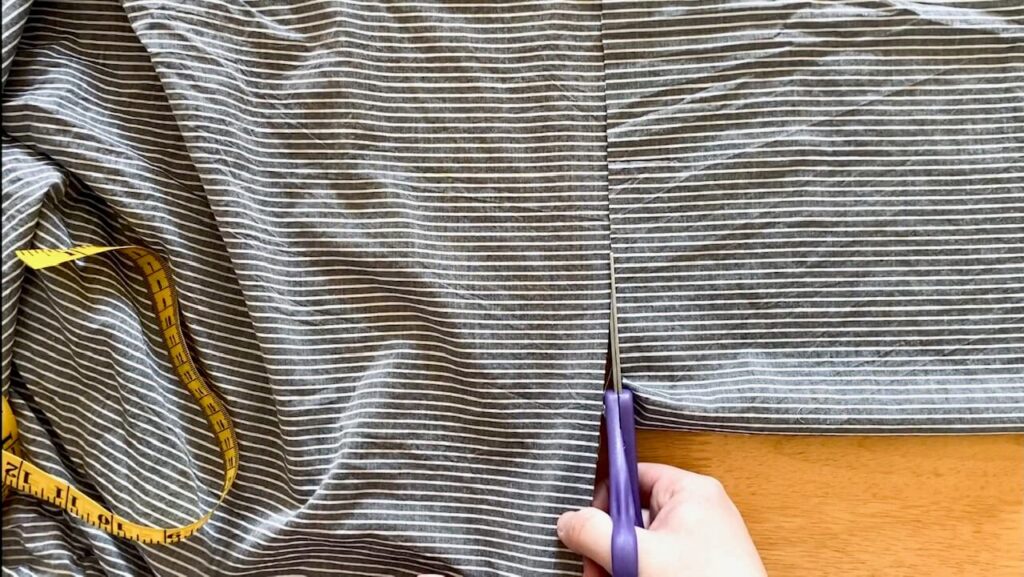
- Cut a piece of 100% cotton fabric that is 30 inches long by 13 inches wide.
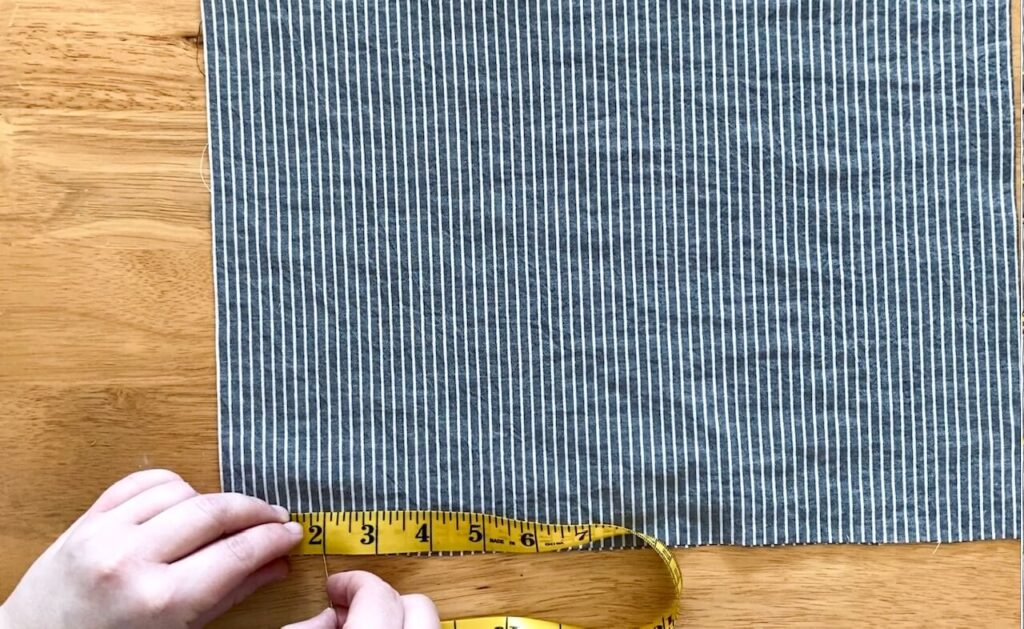
- Fold the cut piece of fabric in half (hamburger style) with the wrong side facing out. You should now have a piece that is 15 inches by 13 inches. Press the folded seam with an iron.

- Using your fabric measuring tape, mark two inches from the top (the side that is open) and place a pin through both pieces of fabric. Repeat for the other side.
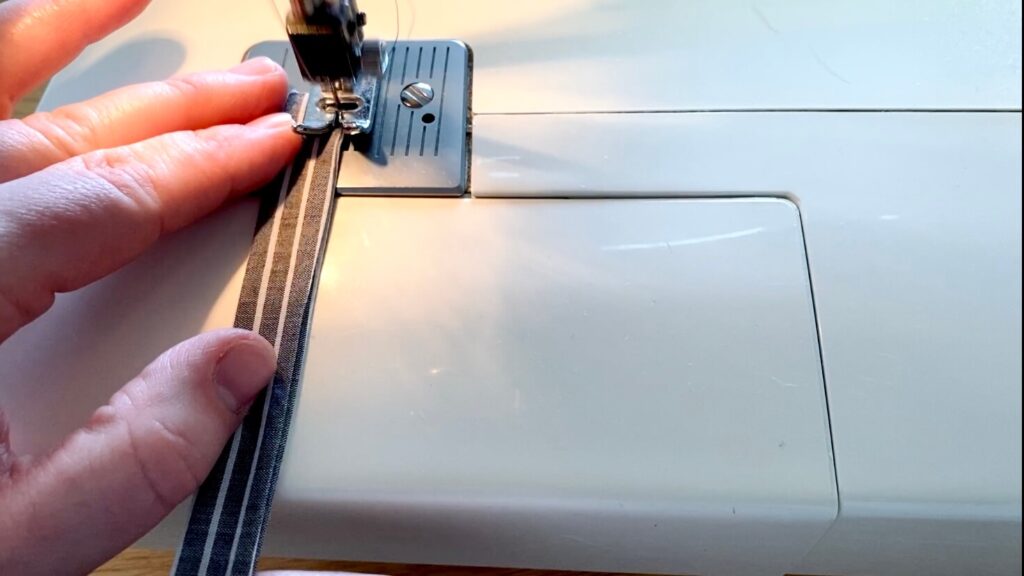
- Sew along each long side using a 1/2 inch seam and stop when you get to the pin. Be sure to forward and backward stitch at the beginning and end to lock in the stitch and reinforce it.

- Trim off the excess fabric on the sides you just sewed, leaving about 1/4 inch of fabric on either side.

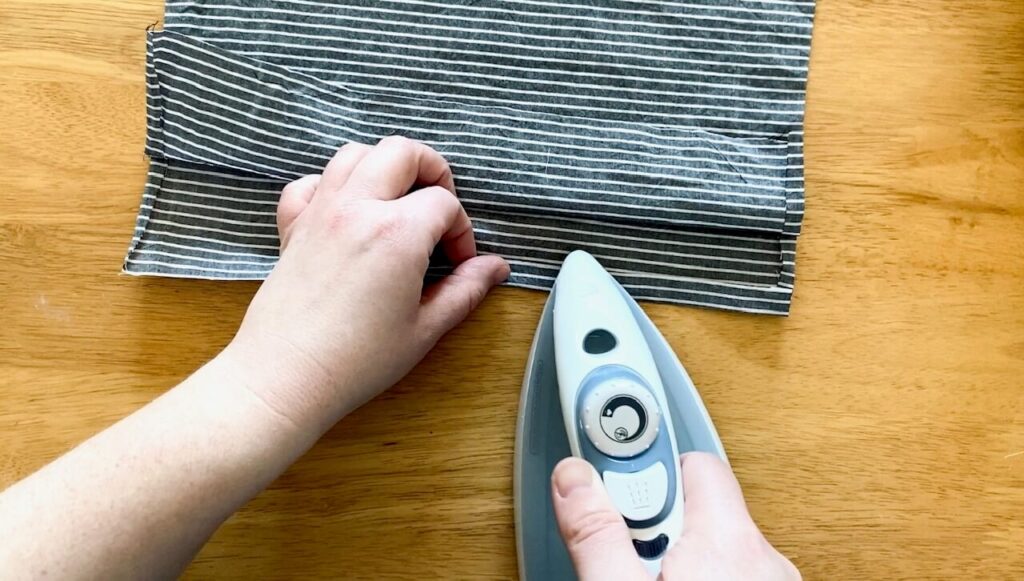
- Flip the bag right side out and push the corners out using a blunt object like the end of scissors or a crochet hook. Press the entire bag again.
- The opening to the bag should have two separate sides. Starting on one side, fold down the top about 1/4 inch and press. Then fold it over again, lining it up with the two inch mark, and press again. Repeat for the other side.
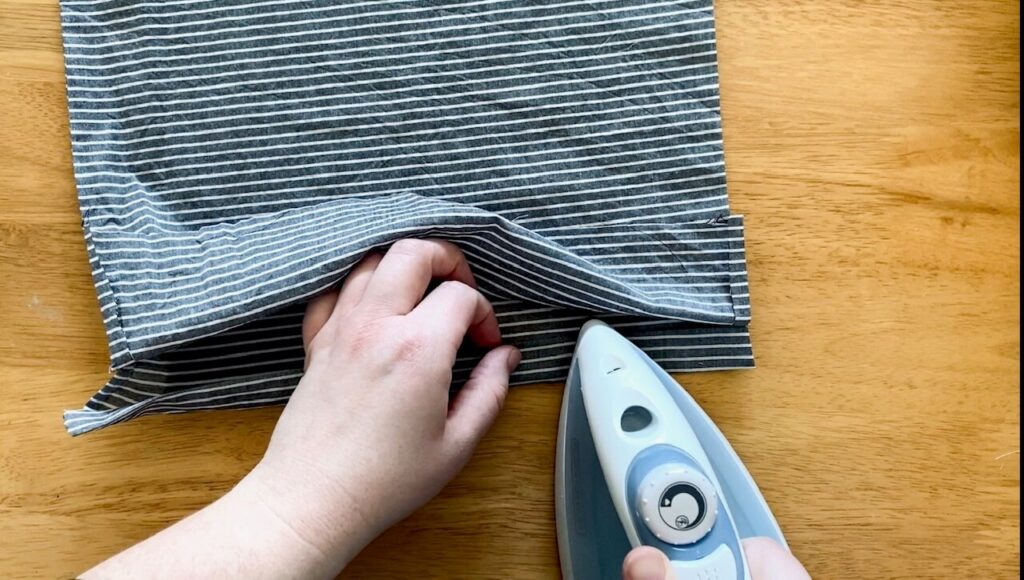
- Sew the bottom of the fold (the open end) as close to the edge as you can (top stitch), making sure to forward and backward stitch at the beginning and end. This will create a channel for the ties. Repeat for the other side.

How to Make the Ties
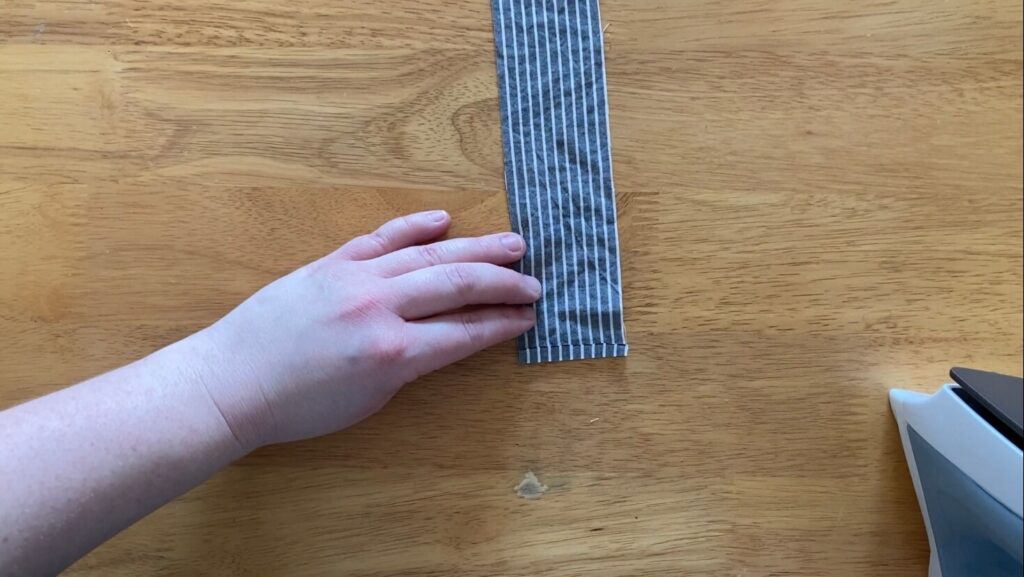
- Cut two strips of fabric that are 22 inches long by 2 inches wide.

- Fold each short end 1/4 inch and press.
- Fold down one long side about 3/4 inch and press. Then fold down the other long side about 1/4 inch (don’t overlap the fabric) and press.
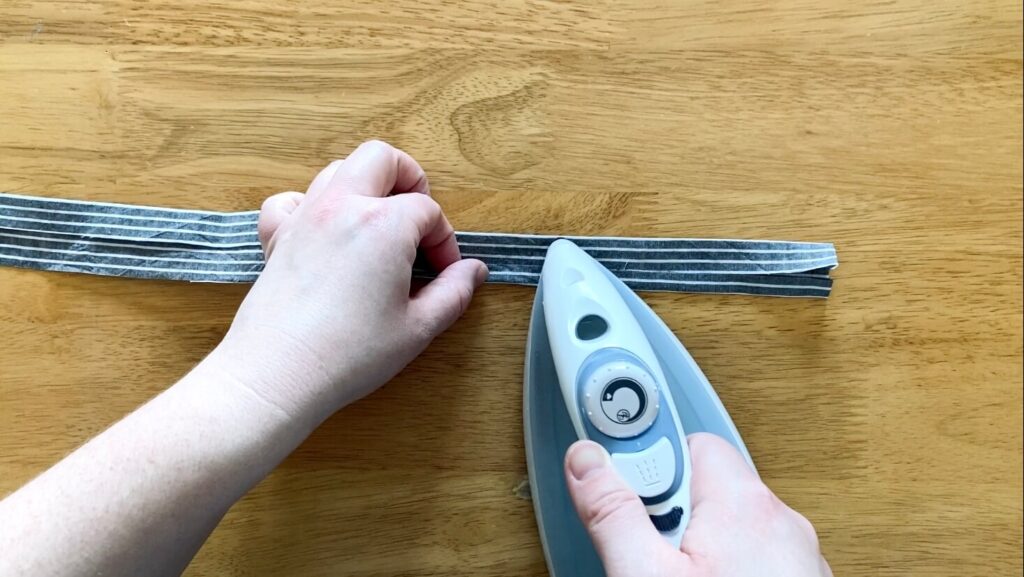
- Fold the entire piece in half lengthwise and press.
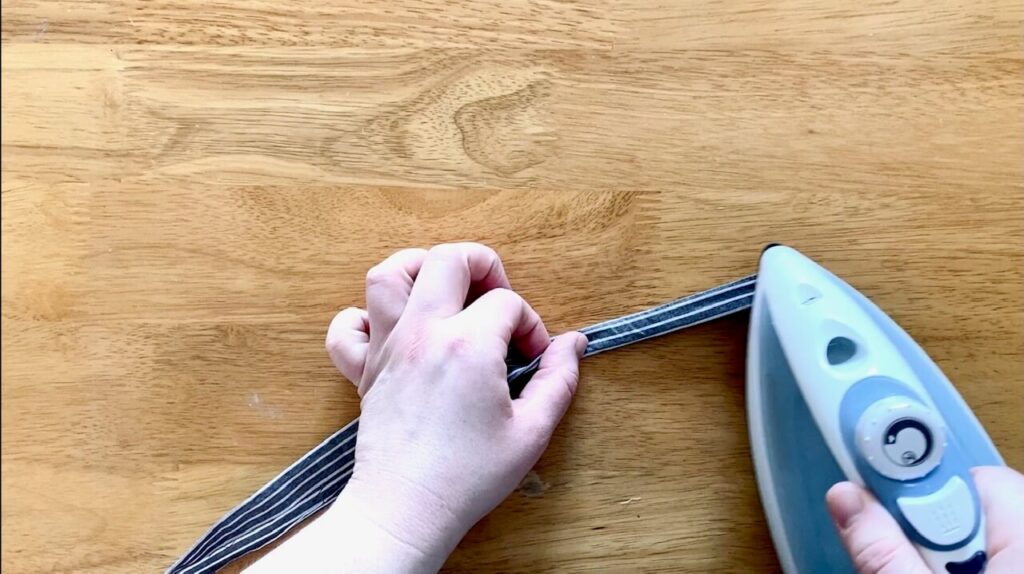
- Top stitch starting on the long side that has the opening. Continue to top stitch along the first short side, the other long side and lastly, the second short side. Then repeat this process for the second tie.
How to Assemble the Reusable DIY Bread Bag
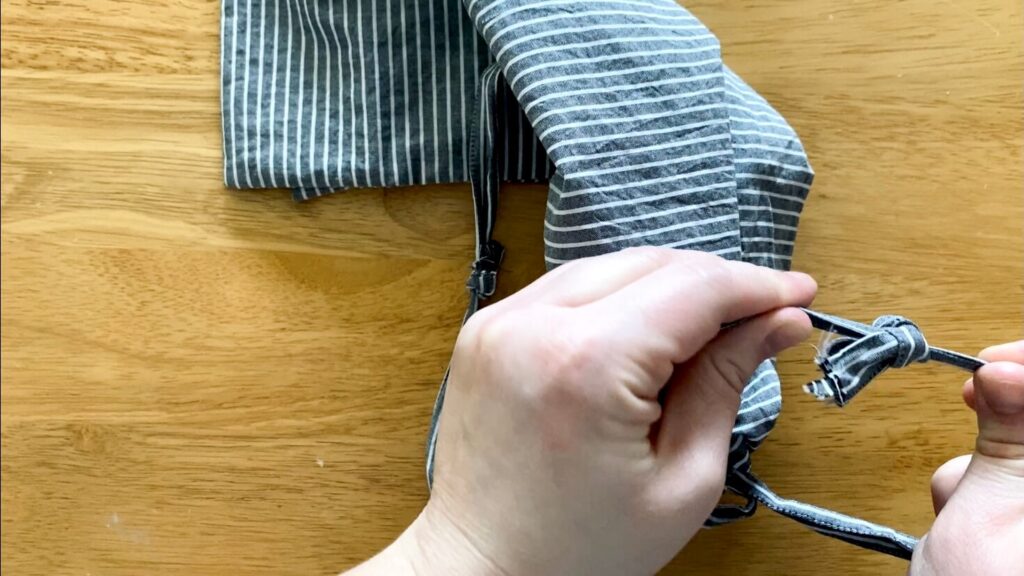
- Slide a safety pin into one of the short edges of the first tie and secure it.
- Place the safety pin in one of the openings and feed it, and the tie, through the entire first channel and out the other side. Then continue feeding the tie into the other channel on the opposite side. Each end of the tie should be coming out of each of the two openings.
- Repeat the process with the second tie, but feed the safety pin and tie into one of the openings opposite the ends of the other ties. It’s the opposite side you fed the first tie through.

- You should end with having two ends of one tie on the left side and two ends of the other tie on the right side. Tie a knot in both ties as close to the end as you can.
- Now your bag is finished! You should be able to pull on both sides of the ties and close the bag!
Size 2: One Loaf
For size two, the process is the same as size one, but the dimensions are slightly different.
- Cut a piece of 100% cotton fabric that is 30 inches long by 9 inches wide.
- Fold the cut piece of fabric in half (hamburger style) with the wrong side facing out. You should now have a piece that is 15 inches by 9 inches.
- Repeat the same process above to complete the one loaf bread bag.
How to Make the Ties
- Cut two strips that are 20 inches long by 2 inches wide.
- Complete the ties following the same steps above.
How to Assemble the Reusable Bread Bag
- Follow the same steps above.
NOTES
- Try getting your fabric at a place like Joann or Michaels because they usually have sales and coupons!
- Use a fabric that is 100% cotton or linen, as it provides nice airflow for your bread.
- Use a cotton or all purpose thread that is in a coordinating color to your fabric.
- Wash and dry your fabric prior to making your reusable bread bags, especially if you’re using cotton. You want to pre-shrink your fabric so your bag doesn’t shrink when you wash it after it’s finished.
- Wash your dirty bread bag on cold water and dry on low heat.

How to Make a Reusable DIY Bread Bag
A reusable DIY bread bag is easy to make and great for storing your fresh homemade bread. The breathable material allows for airflow, keeping your bread fresher longer. These bags are a great no-waste option and make wonderful gifts for the bakers in your life!
Materials
- 1/2 yard 100% cotton or linen fabric
- 100% cotton or all purpose coordinating thread
Tools
- Craft scissors
- Pins
- Tape measure
- Iron and ironing board
- Sewing machine
Instructions
Size 1: Two Loaves (Video Tutorial)
- Cut a piece of 100% cotton fabric that is 30 inches long by 13 inches wide.
- Fold the cut piece of fabric in half (hamburger style) with the wrong side facing out. You should now have a piece that is 15 inches by 13 inches. Press the folded seam with an iron.
- Using your fabric measuring tape, mark two inches from the top (the side that is open) and place a pin through both pieces of fabric. Repeat for the other side.
- Sew along each long side using a 1/2 inch seam and stop when you get to the pin. Be sure to forward and backward stitch at the beginning and end to lock in the stitch and reinforce it.
- Trim off the excess fabric on the sides you just sewed, leaving about 1/4 inch of fabric on either side.
- Flip the bag right side out and push the corners out using a blunt object like the end of scissors or a crochet hook. Press the entire bag again.
- The opening to the bag should have two separate sides. Starting on one side, fold down the top about 1/4 inch and press. Then fold it over again, lining it up with the two inch mark, and press again. Repeat for the other side.
- Sew the bottom of the fold (the open end) as close to the edge as you can (top stitch), making sure to forward and backward stitch at the beginning and end. This will create a channel for the ties. Repeat for the other side.
How to Make the Ties
- Cut two strips of fabric that are 22 inches long by 2 inches wide.
- Fold each short end 1/4 inch and press.
- Fold down one long side about 3/4 inch and press. Then fold down the other long side about 1/4 inch (don't overlap the fabric) and press.
- Fold the entire piece in half lengthwise and press.
- Top stitch starting on the long side that has the opening. Continue to top stitch along the first short side, the other long side and lastly, the second short side. Then repeat this process for the second tie.
How to Assemble the Reusable DIY Bread Bag
- Slide a safety pin into one of the short edges of the first tie and secure it.
- Place the safety pin in one of the openings and feed it, and the tie, through the entire first channel and out the other side. Then continue feeding the tie into the other channel on the opposite side. Each end of the tie should be coming out of each of the two openings.
- Repeat the process with the second tie, but feed the safety pin and tie into one of the openings opposite the ends of the other ties. It's the opposite side you fed the first tie through.
- You should end with having two ends of one tie on the left side and two ends of the other tie on the right side. Tie a knot in both ties as close to the end as you can.
- Now your bag is finished! You should be able to pull on both sides of the ties and close the bag!
Size 2: One Loaf
- For size two, the process is the same as size one, but the dimensions are slightly different.
- Cut a piece of 100% cotton fabric that is 30 inches long by 9 inches wide.
- Fold the cut piece of fabric in half (hamburger style) with the wrong side facing out. You should now have a piece that is 15 inches by 9 inches.
- Repeat the same process above to complete the one loaf bread bag.
How to Make the Ties
- Cut two strips that are 20 inches long by 2 inches wide.
- Complete the ties following the same steps above.
How to Assemble the Reusable Bread Bag
- Follow the same steps above.
Notes
Try getting your fabric at a place like Joann or Michaels because they usually have sales and coupons!
Use a fabric that is 100% cotton or linen, as it provides nice airflow for your bread.
Use a cotton or all purpose thread that is in a coordinating color to your fabric.
Wash and dry your fabric prior to making your reusable bread bags, especially if you're using cotton. You want to pre-shrink your fabric so your bag doesn't shrink when you wash it after it's finished.
Wash your dirty bread bag on cold water and dry on low heat.
CHECK OUT MORE OF MY DIY PROJECTS
Looking for other easy DIY projects? Check out these:
Did you make this reusable DIY bread bag? If so, tag me on Instagram (@thesimplehomeplace) to show me your own recreation!


What a great idea!
Thank you!
I love your tutorials! This sounds awesome. I’ve never even baked my own bread but now I feel like I need to so I can make this bread bag haha!
Thank you so much! And I love that haha 🙂
I love this idea!! Genius and so green! I’ve been making homemade bread throughout the pandemic, and my fam has requested we keep it up! So yummy! These bags are perfect. Not a great sewer, tho…happy for your tutorial! 😉 Thank you!
Thank you! I’ve been making bread a lot more over the last year! I hope the tutorial helps! I’m still very new to sewing, so if I can do it, I’m sure you can too!
I love this tutorial! I’ve been wanting to buy bread bags like these but I think I might try making some instead!
Thank you! Happy sewing 🙂
Well, this is just the most perfect craft. Thanks for this tutorial!
Thank you so much 🙂
This looks so good! What a great staple to have in hand!
Thank you! I’m glad it was helpful to you 🙂
Thanks for sharing! Does it help long?
I find it helps to keep the bread fresher longer, for sure!
Can you use these to freeze bread as well? I like to make a couple loaves at a time and freeze one.
That’s a great question! You definitely can use these for freezing bread, especially if it’s for a short period of time. If it’s for a long period of time, I like to use plastic gallon bags or silicone bags because I think they are better at keeping the bread from getting freezer burnt. Hope that helps!
Thanks!!!
Hi….Such a simple to follow tutorial. Do you finish off the side seams at all to prevent fraying? Thanks!
Thank you, I’m glad you thought so 🙂 I don’t finish off the side seams, but you definitely could, especially if you’re using the cotton shirting like I did in the tutorial.
What does hamburger style mean?
Here’s ab example. If you have an 8.5 x 11 piece of paper laying vertically, you would fold that piece of paper over the horizontal center, meaning you would fold the 8.5″ side over to touch the other 8.5″ side. So the paper would be wider than it is tall when it’s folded. Hot dog style would be folding the paper over the vertical line, so the 11″ side to the 11″ side. So the paper would be taller than it is wide when it’s folded. It’s hard to describe in written form, but hopefully that helps.
I need to make a few of these.
I hope you love them!
Thank you so much for this tutorial! I used it today to make 2 bread bags and they turned out beautifully.
Thank you, that’s so good to hear!
Thx so much for these instructions- starting another bag and then I’m gonna start on the dishcloth ! Love your work! And love your hamburger and hotdog instructions are genius!
Oh I’m so glad they’re helpful! Happy sewing 🙂
Can these bags be coated with bees wax before sewing?
I have not tried that yet, although I would like to soon, but I would suggest doing it after you’ve sewed the bags because you don’t want your sewing machine getting gummed up by the wax.